Grass Fed Beef Instant Pot Recipe: Creamy Taco Soup

Bowl of Creamy Taco Soup

Bowl of Creamy Taco Soup

This creamy soup is Tex-Mex at its finest. My Texan mom is an Instant Pot whiz, and she created this soup that I’m eager to share. Growing up in Texas, zingy and creamy dishes like this served with cornbread and butter were a staple.

As I was cooking this recipe, the smells that filled my house transported me back to late 90s north Texas, full of happy memories, simpler times, and delicious food. She was a busy, working mom, and she made a lot of effort to cook a nutritious meal for us every night.

Now that I’m a toddler mom, I use the Instant Pot several times a week to make my life easier. This soup is prepared entirely in the Instant Pot, so there is very little cleanup after cooking. All in all, active cooking time was about 25 minutes.

This recipe is flavorful without being spicy, making it a kid-friendly dish. If you like it spicier, adding a seeded and chopped jalapeno with the other pepper would be a delicious addition.

I hope you find comfort and flavor in this dish! Thanks, Mom!

Creamy Taco Soup

INGREDIENTS

  • 1 cup dry or 1 15 oz can pinto beans

  • 2 Tbsp apple cider vinegar, optional

  • 3 Tbsp butter

  • 1 onion, chopped

  • 1 pepper, chopped (I used bell pepper, poblano or anaheim would work nicely as well.)

  • 1 lb Saint John’s organic, grass-fed ground beef

  • 2.5 Tbsp chili powder

  • 1 tsp cumin

  • 2 c chicken or beef broth

  • 15 oz tomato sauce

  • 10 oz diced tomatoes with green chiles, drained

  • ½ block cream cheese

Optional garnishes:

  • Sour cream

  • Cheddar cheese, grated

  • Roasted hatch green chiles

METHOD

Instant Pot Pinto Beans

If your pinto beans are dry, here’s how you cook them in the instant pot. If your beans are canned or already cooked, skip ahead to “Creamy Taco Soup”.

The night before or about 8 hours before cooking, soak the beans in the instant pot with water about 2 inches above the beans. Add 2 Tbsp apple cider vinegar, stir into beans, and let sit 8-12 hours.

Soaking the beans before cooking helps pre-digest them and neutralize lectins and other anti-nutrients. This also reduces cooking time and promotes a more even cook on each bean, preventing splitting and bursting.

Pinto beans soaking in water and apple cider vinegar.

Pinto beans soaking in water and apple cider vinegar.

When the soaking time is up, drain the beans in a colander and rinse well. Add back to instant pot and cover with water about 2 inches above the beans. Place lid on instant pot. Set valve to sealing. Select manual pressure, high setting, and cook for 25 minutes. If you didn’t soak beans, cook for 35 minutes. 

When cook time is up, allow instant pot to depressurize for 10 minutes and then quick release. Drain and rinse beans and set aside.

Drained and rinsed pinto beans.

Drained and rinsed pinto beans.

Creamy Taco Soup

Set the instant pot to the “Saute” setting and add butter. When butter is melted, add chopped onions and cook until translucent, about 3 minutes. Stir occasionally as the saute function is very hot.

Chopped onions, sauteeing in butter.

Chopped onions, sauteeing in butter.

Add ground beef and season with 2 pinches of salt. Break up ground beef with a wooden spoon as it cooks, stirring frequently. When ground beef is 75% cooked, add pepper.

Green pepper and Saint John’s ground beef sauteeing in Instant Pot.

Green pepper and Saint John’s ground beef sauteeing in Instant Pot.

When ground beef is finished cooking, add chili powder and cumin and turn off Saute function.

Chili powder and other spices added to Instant Pot.

Chili powder and other spices added to Instant Pot.

Add broth, tomato sauce, and drained diced tomatoes with green chiles. Stir to combine.

Place lid on instant pot. Set valve to sealing. Select manual pressure, high setting, and cook for 10 minutes.

When cook time is up, allow Instant Pot to depressurize for 10 minutes and then quick release.

Add beans and cream cheese and cover, stirring every minute or so until cream cheese is melted into soup. When cream cheese is melted, add salt to taste. The amount of salt you need will vary as sodium content in canned items and broths can vary quite a bit. Start with ¼ tsp, taste, and add more if needed. I ended up adding about ½ tsp.

IMG_0697.JPG

Set to “Keep Warm” setting to keep the soup warm until you’re ready to serve!

We served it with sour cream and roasted hatch green chiles. Rice or tortilla chips would make a nice pairing with this delightful soup.

Creamy Taco Soup topped with roasted green chiles.

Creamy Taco Soup topped with roasted green chiles.

We all had seconds and my husband had thirds! This soup is a perfect quick dinner for wintertime that is packed with Tex-Mex flavor. Enjoy!

IMG_0707.JPG

Tag us on Instagram to let us know what you think!

2020 at Saint John's Organic Farm: A Year in Review

What a year we have had! As a nation and a world, this has been a roller coaster. Averting WW3 in February, a global pandemic and fear sweeping to the forefront in March as well as an earthquake here in southern Idaho, lockdowns in much of the world through the spring and again in places this fall, a murderhornet freakout, massive riots in major cities across the country during the summer, followed by enormous wild land fires, and then a contested election: it has been an eventful year to say the least.

But we have also seen enormous positives. As the global system of shipping commodities every which way staggered and shook this spring, people turned back to a local resilience, searching for nutritionally dense and healthy food, a connection to the earth, friendship, and a return to old ways of inter-dependence within a local community.

Saint John’s Organic Farm

Saint John’s Organic Farm

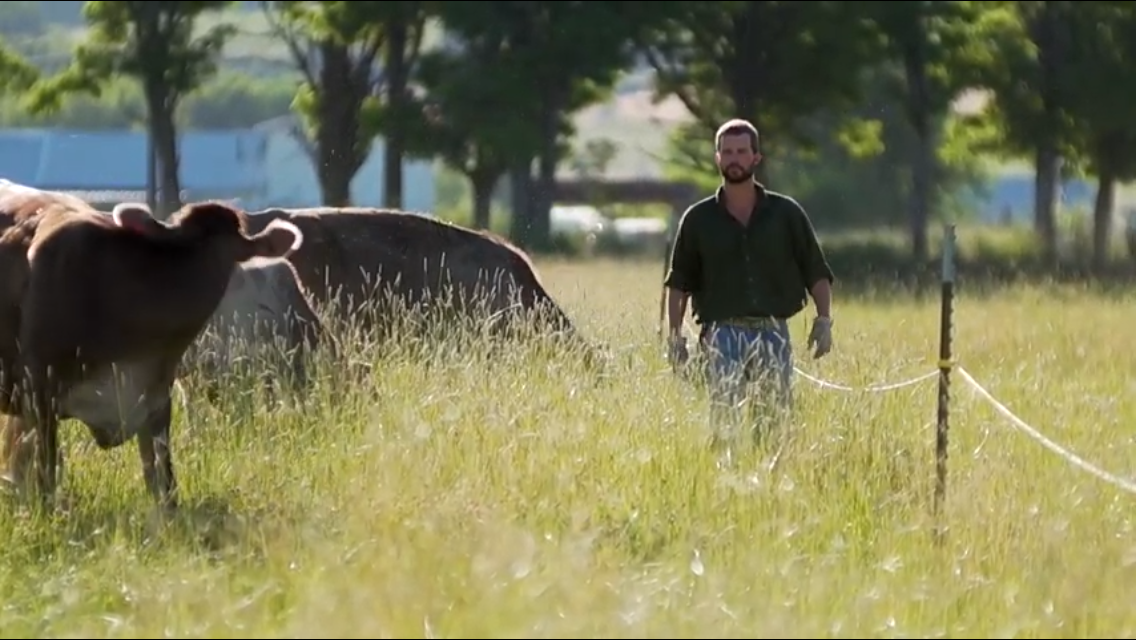
We have been largely insulated here on the farm, our work continues day by day. Cows need new pasture every day, so I’m out walking around in the sunshine moving fences to give them access to fresh grass and in the summer running irrigation to replenish pastures as they are grazed.

Since we harvest much of our beef in the autumn every year, we were positioned well this spring to meet the quick increase in demand. I was running every week to our cold storage in Boise to refill our freezers and make deliveries.

We hosted farm tours here in the open air and sunshine twice a month through the summer, showing people our cows, fields, and growing practices, tasting wild plants and the beef we raise, and enjoying conversations with people from a wide range of backgrounds and all walks of life, united in the pursuit of a healthy life and delicious food. We are thankful for the renewal and continuation of old friendships, and the beginning of new ones.

Saint John’s Organic Farm

Saint John’s Organic Farm


On a personal note, this has been a good year for me! I got my book Share the Gift finished and published, had a number of adventures hiking mountains and camping (including summiting two more Idaho 12ers with a buddy this summer), spent a number of gorgeous days out on Black Canyon Reservoir with a canoe or sailing our little Sailfish, and in November I proposed to the girl I’ve been dating for the last year and she said yes!

January 1st I kicked off 2021 with bagpipes at midnight, and then running a Murph workout at the Emmett City Park later in the day.

Aaron Dill, New Years Murph Workout 2021

Aaron Dill, New Years Murph Workout 2021

As we enter a New Year, I am reminded of the ‘Litany of Fear’ in Frank Herbert’s “Dune”:

"I must not fear.
Fear is the mind-killer.
Fear is the little-death that brings total obliteration.
I will face my fear.
I will permit it to pass over me and through me.
And when it has gone past I will turn the inner eye to see its path.
Where the fear has gone there will be nothing. Only I will remain."

(is anyone else excited for the new film to be released? I loved the book, and the movie trailer looks like they might capture it really well)

And so by the grace of God we go forward. Here’s to a rich 2021, full of the joy of family and friends and delicious food!

 All the best,

Aaron

All About Grass Fed Beef Bone Broth

Good broth resurrects the dead. - South American Proverb

Good broth resurrects the dead. - South American Proverb

Bone broth has had a resurgence into the mainstream in the last few years, and for good reason. It's an ancient food, known for fortifying our immune system, restoring the gut lining, replenishing our joints and tissues, and being rich in amino acids and minerals not easily found in our Western diet.

Namely, bone broth is rich in glycine (an amino acid), collagen, glucosamine (essential for joint health), calcium, magnesium, phosphorus, silicon, sulphur, and trace minerals. By utilizing the whole animal, we can add a spectrum of nutrients to our diets that are no longer commonly found.

For further reading on the benefits and history of bone broth, as well as some cooking tips for creating your own, check out the article, "Broth is Beautiful" from the Weston A. Price Foundation or listen to this entertaining presentation, "Bone Broth and Health: A Look at the Science", from Dr. Kaayla Daniel at the Ancestral Health Society.

How to Use Bone Broth

Broth is just the beginning! Use bone broth instead of boullion or packaged broth when called for in your favorite recipes. Create chili, soups, stews, sauces, or drink from a cup with a dash of salt for a warming tonic as the weather cools down.

Sourcing Bones

Using high quality organic, grass-fed and grass-finished beef bones is essential to creating broth. From a nutritional perspective, the animal cannot give what it doesn't have. Livestock fed an inappropriate diet will not have bones with adequate nutrition to extract for bone broth.

This is especially true if animals were exposed to glyphosate, the active ingredient in common herbicide (RoundUp) used in modern agriculture. There is evidence that livestock exposed to glyphosate (through food or water runoff) will not have an adequate amount of glycine, an essential amino acid abundant in bone broth, and the livestock will have glyphosate instead of glycine.

This is worrisome because our connective tissues and joints will accept glyphosate in the stead of glycine, as they are chemically very similar molecules. This can be very disruptive for our health, as we know human proteins contaminated with glyphosate cease to functional normally. Glyphosate is prohibited for use for USDA certified organic farms, so choosing organic keeps glyphosate out of your bone broth.

We have high quality beef bones in stock right now! Our bones are certified organic, grass-fed, grass-finished, and grown locally near Emmett, ID. Call or email to order! 

Beef Stock

from Nourishing Traditions, p. 122

INGREDIENTS

  • about 4 pounds beef marrow and knuckle bones

  • 1 calves foot, cut into pieces (optional)

  • 3 pounds meaty rib or neck bones

  • 4 or more quarts cold filtered water

  • 1/2 cup vinegar

  • 3 onions, coarsely chopped

  • 3 carrots, coarsely chopped

  • 3 celery sticks, coarsely chopped

  • several sprigs of fresh thyme, tied together

  • 1 teaspoon dried green peppercorns, crushed

  • 1 bunch parsely

>> Continue reading Beef Stock recipe

Bone broth is packed with nutrition, versatile, and economical. I hope you found this useful. Tag us on Instagram @stjohnsorganicfarm when you make your own bone broth!


Paleo Grass Fed Beef Hash Recipe: Tastes like Steak and Eggs Diner-Style

IMG_0489.JPG

Hearty, diner-style hash using beef stew meat. Layers of garlic, pepper, and satisfying savory flavor. This recipe can easily be made gluten-free. Enjoy! 

Hearty Beef Stew Meat Hash

INGREDIENTS

  • 1 lb St. John’s organic, grass-fed beef stew meat, cut into 1/2-1 inch chunks

  • 1/2 cup olive or avocado oil

  • 1/2 cup soy sauce (or gluten-free alternative tamari or coconut aminos)

  • 1/4 tsp red pepper flakes (add more if you like spicy food, we use 1/2 tsp, omit if you don’t like spicy)

  • 4-6 cloves garlic, minced

  • 2 tsp Italian seasoning blend

  • 1/2 tsp ground black pepper

  • if using soy sauce alternative, add 1 tsp salt (if you use soy sauce, do not add this as it will be too salty)

  • 3-5 potatoes

  • 2 tbsp olive or avocado oil

  • 1 onion, sliced thinly into half moons

  • 1-2 bell peppers, sliced into strips

  • salt and pepper to taste

Optional garnishes:

  • fried egg

  • sour cream

  • minced cilantro

  • sliced green onions

  • sliced cherry tomatoes

METHOD

The Day Before

Marinate beef for a few hours before cooking. I usually marinate it overnight.

1. Chop beef into 1/2 - 1 inch chunks.

2. Whisk together oil, soy sauce or alternative, red pepper flakes, garlic, italian seasoning blend, black pepper, and optional salt.

3. Add meat to marinade and refrigerate for 4 hours or overnight.

The Day Of

1. Preheat oven to 425 degrees. Coat potatoes in oil, salt, and pepper. Place on baking sheet and roast for 20-25 minutes.

2. While potatoes are roasting, cook beef. Preheat a skillet over medium heat. Add meat to the pan. Be careful not to crowd the pan in order to ensure even cooking. Cook 1-2 minutes each side. I recommend using tongs. Work in batches, transferring the cooked meat to plate when done.

3. Using the same pan with delicious marinade remaining from the beef, turn the skillet to medium heat and cook onions 6-8 minutes, until well browned and limp.

4. Add peppers and continue to cook 3-5 minutes, until soft.

5. Turn down heat to low-medium, add in roasted potatoes, stir to combine, and cook for about 2 minutes. Potatoes will soak up remaining marinade left in the pan, imparting extra flavor. Add cooked beef to pan, along with any accumulated juices in bowl. Stir to combine and heat through, about 1 minute.

6. Taste for salt and pepper and adjust seasoning as needed. Serve promptly with optional garnishes. Our favorites are fried egg, cilantro, and green onions.

A delicious alternative preparation is to use the beef as taco meat instead of in a hash. Marinate and cook according to above directions and put meat in tacos, on top of beans and rice, or in a taco salad and serve with salsa. 

I hope you enjoy this versatile, savory hash recipe. We enjoy the diner-esque vibe of this dish and add it to our meal plan regularly. Tag us on Instagram to let us know what you think!

Healthy Habits: Support Your Health in Every Season

2020 has been a stressful year for many, but be encouraged because there are steps we can take to thrive -- mentally, physically, and spiritually.

Jonathan laying on a pile of weeds, pushed by Thomas!

Jonathan laying on a pile of weeds, pushed by Thomas!

Play

Modern lifestyles and occupations have diminished a lot of opportunities to move our bodies and play. A good place to start is to go outside and copy what your kids or grandkids are doing. If they jump, skip, or run, follow suit!

Seize and be in the moment. Play helps us to be present in mind, body, and spirit. Exercise doesn’t have to be a drudge. Make it play and you’ll want to do it because it’s fun.

Farm “work” in the winter -- AKA Aaron and Jonathan playing in the snow.

Farm “work” in the winter -- AKA Aaron and Jonathan playing in the snow.

Even in cold or snowy weather, take advantage of the beautiful snow and embrace the season we are in. An old Swedish proverb says “There’s no such thing as bad weather, only bad clothes.”

Cold exposure is known to have health-promoting effects, such as improved circulation and thermo-regulation as well as lowering inflammation and assisting the immune system. A short walk in the cold each day is enough exposure to gain some of the benefits.

Touch

Physical contact increases oxytocin and dopamine in our brains. Oxytocin strengthens our relationship bonds while dopamine helps us feel pleasure and satisfaction. Spending time with loved ones and pets does a lot of good to our mental and physical well-being. Hugs are essential for us and our loved ones!

Sleep

We all know we need more rest, and it can be hard to come by unless we make time for it. Our body needs to reset, and most Americans are not getting enough sleep. Aim for 7-9 hours, more if you’re feeling unwell.

Lack of sleep increases risk for obesity and insulin resistance, leads to workplace errors, motor vehicle accidents, and is known to affect mood disorders like depression and anxiety. Prioritizing sleep makes you more productive for all of your waking hours!

Supercharge your sleep by improving your sleep environment:

  • Make your bedroom as dark as possible

  • Cover light sources (I’ve had good luck with black electrical tape)

  • Use blackout curtains

  • Keep your bedroom at a cool but comfortable temperature

  • Avoid screens for at least an hour before bed and make your bedroom a screen-free haven. Blue-light from our devices (and all artificial lights) impede melatonin production by affecting our pineal gland.

Sunrise on the farm.

Sunrise on the farm.

Sunshine

In the wintertime, most people don’t get outside enough because of the cold weather. Getting adequate sunshine, especially the morning sunrise is truly key to optimal health.

Morning sunlight sets our circadian rhythm, which regulates many of our body’s processes. Sunlight energizes our mitochondria, the tiny engines inside our cells. Our mitochondria take energy from our food and turn it into usable energy for all of our cells to expend. Mitochondria sustain every aspect of our bodies, and supporting our mitochondria supports our whole being.

Spending time outside in the fresh air and sunshine is such a mood-boosting and energizing activity. Any time I’m feeling in a funk, a brisk walk outdoors helps me recenter.

Quiet Reflection and Meditation

While the holiday season can be full of appointments and to-dos, it’s important to make time to reflect and connect. Prayer, meditation, and journaling are all practices that bring mental stillness and clarity.

Daily stresses can often feel overwhelming. Prayer and meditation help us gain a long-term view that puts our momentary worries into proper perspective. If you are feeling stressed in the upcoming weeks, take a minute for yourself. Take a breath. Pray. Hug your loved ones. Reconnect.

When it comes to our health, we have the power to choose health promoting habits so that we can thrive. May your year in 2021 be full of health and vitality!

Grass Fed Beef Bone Marrow: Use it for a Luxurious Steak Dinner in Twenty Minutes

Marrow bones in pan, ready to be roasted.

Marrow bones in pan, ready to be roasted.

This is a recipe for the French dish Entrecote à la Bordelaise, a classic ribeye steak served with shallots and bone marrow.

A bite of this can be best described as "meat heaven". It feels luxurious, is incredibly nourishing, and takes only 20 minutes to prepare. Enjoy!

If you’re active on Instagram, please tag us at @stjohnsorganicfarm when you post a photo of the final result! We’d love to see how it went in your kitchen!

Entrecote à la Bordelaise

INGREDIENTS

  • 2 St. John’s organic, grass-fed ribeye steaks

  • 3-5 St. John’s organic, grass-fed marrow bones

  • 1 shallot, finely diced

  • salt

  • pepper

METHOD

  1. Preheat oven to 400 degrees. Place bones in baking dish and bake 15 minutes or until marrow is easily removed from bones.

  2. Using a butter knife or small spoon, remove marrow from bones.

  3. Pat steaks dry with paper towel and season well with salt and pepper. Grill steaks until medium-rare, about 3-4 minutes per side.

  4. While steaks are warm, spread bone marrow on steaks and garnish with shallots. Serve immediately.

I hope you enjoy this simple and delightful French dish. Tag us on Instagram to let us know what you think!

Updates from the farm. Dec 2020

The weather is clear and chilly, the days are gorgeous and sunny, and a bit brisk if the breeze picks up.

Saint John’s Organic Farm

Saint John’s Organic Farm

We started feeding hay last week; Aaron and Claire load up 5 of our 750lb bales on the trailer and take it out to the field where they spread it out down the paddock. Right now we have two groups of cows who are each eating about 1000 lbs of hay per day. So Aaron and Claire take out about 4 loads in a morning and then there is enough hay out for the next week. Aaron will set up a movable electric fence to give the cows an appropriate section each day, along the same theory we use when grazing the paddocks in the summer. We have found that it is really good to keep cows in the field all year long, they do just fine in the cold. We adjust their feed rations so they get more if the temperatures plummet, and try to feed a little extra so there are leftovers for them to sleep on, but they seem to adapt quiet well to the low temps. It’s great to have them out on the grass turf even though the grass is pretty well grazed down, they stay healthy in the fresh air and sunshine, and the manure is distributed straight back to the field; it’s a lot less work than cleaning corrals, managing compost windrows, and hauling compost out to spread in the fields.

Aaron Dill - with Ragnar, hauling hay out to the field

Aaron Dill - with Ragnar, hauling hay out to the field

The steers are still grazing, and doing well on the stockpiled grass. At this rate we’ll graze them all winter long on grass that grew this fall. We’ve managed to do this every year for the last 10 years, except for the snowpocalyse in 2016. Then we had to feed hay to the steers too, though the grass was still viable to graze after the snow melted down.

Our frost-free waterlines are working well to all groups of cows. What a gorgeous system! Aaron turns them on when he goes out on his daily rounds to move fences to feed cows, and then several of us split up in the evenings to go drain the short supply hoses for the night. So much better than the years when we had to haul all their water out in a 500 gallon tank! Especially with 125 head, many of which are eating hay, we were hauling water almost every day.

Beef harvest is all wrapped up for the year, but we have about 7 pallets full of beef in Boise Cold Storage, so we’re well supplied to meet anyone’s beef needs throughout the winter and spring!

We are already looking at which rib roast we want for Christmas dinner.

Cold plunge! November 2020. Click on the picture to see a video of the whole experience!

Cold plunge! November 2020. Click on the picture to see a video of the whole experience!

Aaron recently began a new practice of ice water plunges, exploring the Wim Hof practice for health. He set up an old water tub in his backyard, and goes out every couple days to immerse in the ice water. There is some interesting research on the effect of cold exposure, to strengthen your circulation and thermo-regulation, and how it causes a reaction in your core to superheat your blood, like a microfever which cooks out impurities and kills viruses. This takes training however, so it’s best to start with cold showers. Aaron is putting together a progression of cold exposure training ideas that he’ll post on his Share the Gift instagram and facebook pages in the near future. Enjoy! 

May your holidays be bright in the midst of a crazy year, may you enjoy the warmth of your family, and may God grant us all peace.

An Amazing Beef Liver Recipe (That Doesn’t Taste Like Beef Liver)

Beef liver fries

Beef liver fries

Beef liver is known for two things: its all-star nutrient profile and its pungent, unmistakable taste.

My family has tried 4 beef liver recipes in the last year, and this one is excellent because...well, it doesn’t taste like liver! 

The key is to slice and soak the liver; the soaking removes the pungent taste. 

After soaking, the liver is battered, fried, and dipped in garlic aioli --  it’s a crowd-pleasing, crunchy preparation. Enjoy!

Beef liver fry dipped in garlic aioli.

Beef liver fry dipped in garlic aioli.

If you’re an instagramming kind of person, please tag us at @stjohnsorganicfarm when you post a photo of the final result! We would love to see how it went in your kitchen!


Beef Liver “Fries”


INGREDIENTS

  • 1 lb St. John’s organic, grass-fed beef liver

  • 2 - 2 1/2 c flour

  • 1 teaspoon paprika

  • 1/4 tsp salt

  • 1/4 tsp black pepper

  • roughly 2  c buttermilk, milk, or whey

  • roughly 1 c beef tallow, enough to be at least 1/2 inch deep in frying dish

EQUIPMENT

  • cutting board

  • knife

  • food storage container with lid

  • heavy-bottomed dutch oven or deep skillet

  • prep bowls

  • tongs

  • cooling rack (optional)

  • baking sheet (optional)

  • splatter guard (optional)

METHOD

1. Slice liver into 1/4 - 1/2 inch wide strips. Place into food storage container and cover with buttermilk, milk, or whey. I used about 1 cup. Place in refrigerator and allow to soak for at least 2 hours. I left it soak overnight and continued the preparation the following day.

Beef liver sliced into ½-inch wide strips.

Beef liver sliced into ½-inch wide strips.

2. Drain liver and pat dry.

3. Mix together flour, paprika, salt, and black pepper in a shallow bowl. Pour remaining 1 cup buttermilk, milk, or whey into another small bowl.

4. To batter the liver, roll one slice in seasoned flour, dip in milk, and roll in flour again. Place slice on cooling rack. Repeat until all liver slices are battered.

Battered liver slices placed on cooling rack, ready for frying.

Battered liver slices placed on cooling rack, ready for frying.

5. In a heavy-bottomed Dutch oven (I used cast iron), melt tallow on medium heat. When tallow is about 350 degrees, it’s ready to use. If you don’t have a thermometer, sprinkle a pinch of flour on the tallow. If it sizzles and swirls, it’s ready.

Tallow melting in Dutch oven.

Tallow melting in Dutch oven.

6. Place 2-3 paper towels on baking sheet with  unused cooling rack on top. This will be where the fried liver will rest after cooking. The paper towels will help absorb any extra fat.

7. Using tongs, slowly add 3-5 battered liver slices to the hot tallow. The tallow should sizzle and bubble around the liver. Be careful not to crowd the pan, as that will cause the tallow to cool and prevent it from cooking properly. 3-5 slices worked well for my pan.

Liver slices frying in tallow. The bubbling means the tallow is hot enough!

Liver slices frying in tallow. The bubbling means the tallow is hot enough!

8. The liver will cook quickly. Using tongs, slowly flip each liver slice after 1.5 - 2 minutes. Cook another 1-2 minutes and transfer to cooling rack. Repeat until all liver is fried.

NOTES

1. Kid-friendly modification: To make this recipe more kid-friendly, substitute ketchup, mustard, or sour cream for garlic aioli and omit or use less paprika and black pepper in the seasoned flour.

2. Easily reheat by baking at 200 degrees for 10 minutes.

Garlic Aioli

INGREDIENTS

  • 1 large egg

  • 1 - 1.5 c avocado oil, olive oil, or melted duck fat

  • 1 - 2 cloves garlic, minced

  • 1 tsp mustard

  • 1 Tbsp apple cider vinegar or distilled white vinegar

  • 1/4 tsp salt

EQUIPMENT

  • blender or immersion blender

  • rubber or silicone spatula

  • spoon

METHOD

1. Crack egg into blender.

2. Turn blender on medium speed and blend egg.

3. While blender is mixing, very slowly pour oil or fat into blender. Start with one cup and add more at the end to reach your desired consistency. 1 1/3 cup was ideal for me. The stream of oil should be thin. It’s essential to pour slowly for a proper emulsion to form. It should take 4-5 minutes to pour the oil. After 1 cup of oil has been blended in, turn off blender and gently shake and scoop aioli with spoon to determine if desired consistency has been reached. If you prefer your aioli to be thinner, add 1/4 cup of oil at a time in the same slow manner.

4. Turn off mixer. Add garlic, mustard, vinegar, salt. Blend. Taste for salt and desired tanginess. You may desire more mustard or vinegar.

5. Serve at room temperature or chilled. Store in an airtight container in the refrigerator.

I hope you enjoy this unique and crunchy preparation of beef liver. Tag us on Instagram to let us know what you think!

How to Render Beef Tallow

Tallow, golden in color and solid at room temperature.

Tallow, golden in color and solid at room temperature.

Tallow is rendered beef fat. Rendering means the fat has been melted on low heat for several hours and strained of impurities, leaving us a result that is mild in flavor and smell, chock full of fat-soluble vitamins A, D, E, and K and minerals, and long-lasting if well kept.

Equipment

  • St. John’s organic beef fat, chilled

  • Knife

  • Cutting board

  • Food processor or meat grinder (optional but very helpful)

  • stock pot

  • cheese cloth or flour sack towels

  • colander

  • storage vessel (mason jar, baking dish, food storage container, etc.)

Process

1. Trim off bits of muscle and tendon left on the fat. As you cut, you will notice a cellophane-like membrane all over the fat. Pull off what you can, but it’s impossible to get all of it off.

Fat after being trimmed of muscle bits.

Fat after being trimmed of muscle bits.

2. Cut the fat into 1 inch or smaller chunks. Cutting it into chunks will make grinding it in the food processor or meat grinder much easier.

Trimmed fat cut into chunks.

Trimmed fat cut into chunks.

3. Process the fat chunks in the food processor or meat grinder until it looks like ground meat. If you don’t have a meat grinder or food processor, mince the fat as small as you can with a sharp knife. By breaking the meat into small chunks, we create a lot of surface area for each piece of fat. The increased surface area allows for more opportunities for the impurities to render out of the fat. This will result in a tallow that is very mild in smell and taste.

Beef fat processed into small granules.

Beef fat processed into small granules.

4. Place ground fat into a large stock pot or crock pot and turn heat to the lowest setting possible. Stir every hour or so and check that the fat is not burning or smoking. The fat will melt and impurities (small solid bits) will come out of the fat and rise to the top. You will know the fat is done rendering when the impurities rise to the top and look crunchy. The total time will vary based on how much fat you use. Expect it to take 5-10 hours. When I rendered 7 lbs of fat, it finished in 8 hours.

Ground fat beginning to melt in stock pot.

Ground fat beginning to melt in stock pot.

Impurities are rendering out of the melted fat, about 2 hours in.

Impurities are rendering out of the melted fat, about 2 hours in.

5. Line a colander with two layers or cheese cloth or flour sack towels and drain over a large bowl. Gently squeeze the towel to get all of the liquid fat out. Careful, it may be hot!

6. Once it’s finished draining, pour fat into storage vessel of choice. I poured mine into a parchment paper-lined glass baking dish. I did this because I prefer to store my tallow in bars over mason jars. I find it difficult to scoop cold tallow out of a mason jar with a spoon, but slicing off of a cold tallow bar is easy and convenient. (I got this storage tip from Jill Winger at The Prairie Homestead, you’ll love her blog if you’ve gotten this far.)

7. Leave fat at room temperature to cool until solid. When solid, transfer to refrigerator or freezer. I cut mine into bars before refrigerating. Tallow will keep for several months in the fridge, and I’ve read accounts of tallow keeping in the freezer for years! Some people also store it at room temperature; expect it to last about a month on a cool, dark pantry shelf. I was surprised to see the end result be yellow since most commercial tallow renders white. There are a lot of variables that go into the end result color, such as the breed of cow, its diet, its age, and where the fat was on the animal. The rich golden color is an excellent indicator of the vitamin A preset in the fat. This nutrient comes from the grass that the cows ate, and would not be present in grain-fed beef.

Tallow solidifying into a beautiful golden yellow. I was surprised to see it turn yellow!

Tallow solidifying into a beautiful golden yellow. I was surprised to see it turn yellow!

8. Enjoy! Tallow is excellent for frying (McDonald’s used to use it for french fries before switching to harmful vegetable oils), sauteeing, searing meat, and for use in homemade skin-care. My cast iron skillet loves tallow; it adds a great seasoning to keep it naturally non-stick.

Toddler approved!

Toddler approved!