grass fed beef

Grass Fed Beef Environmental Impact

Saint John’s cows grazing on lush, green grass.

Saint John’s cows grazing on lush, green grass.

We’ve heard much in the media over the years of the environmental harm caused by the beef industry, and that the trend of humanity toward vegetarianism - or even veganism - is inevitable. While we share a common concern for environmental sustainability with our vegetarian and vegan friends, we would like to offer a different (and we hope very interesting) view on how cultivating grass fed beef may be a valuable part of the effort to care for the environment and all the ecosystems of the earth. 


Without further ado, here are a few ways grass fed beef’s environmental impact contributes to multi-generational sustainability and regeneration.

Organic and Grass-Fed Environmental Practices

At a baseline, the USDA organic certification requires that no commercial petrochemicals, fertilizers, pesticides, or herbicides are used on our pastures, and that everything the animals eat are GMO-free. Our cows are grass-fed and pasture-raised. When cows are confined to a feedlot, unsanitary conditions for the cows and high concentrations of animal waste runoff pollutes groundwater and surface streams and rivers. Beyond the organic concentrates from the animals themselves, there is almost always a large amount of antibiotic and drug content in the runoff since the beef are highly medicated to attempt to ward off disease in those atrocious conditions. Conventional agricultural practices also cause a loss of habitat for important wildlife ecology. Our organic and grass-fed practices protect wildlife, water purity, air quality, and soil health for future generations.

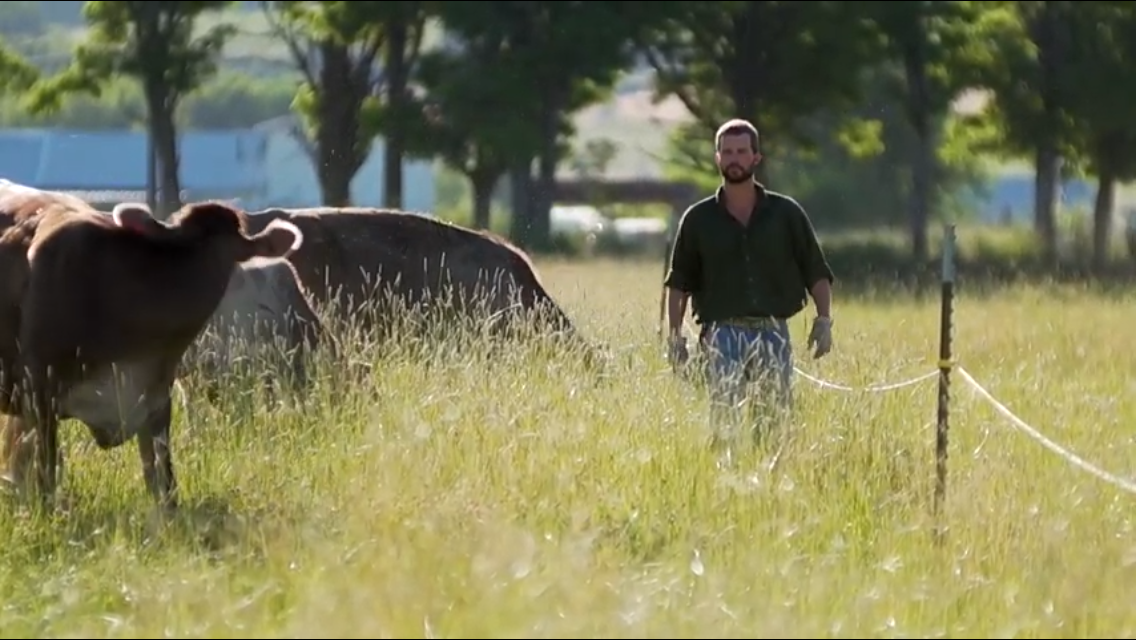
How We Take Environmental Stewardship A Step Further

0924181613_HDR.jpg

Saint John’s cows grazing and lazing.

Because we are a small, grass-fed, and organic family farm, we know our animals and land in great detail. We care for our animals and land with attention and love, and we are able to react to the individual needs of our animals. Our regenerative practices are proactive: we tend and build soil, foster diversity and nutrient density, and encourage quality of life for our land and animals. We want the best nutrition for our cows, so we grow a widely diverse mix of grasses, legumes, and herbs that provide complementing nutritional strengths.

With a small scale local, organic farm, there is much more transparency. There are factory farms that are certified organic, but it’s still factory farming. Conventional agriculture practices do not create the best quality of life for animals or the environment, nor do these practices create as high quality of a product. Beyond organic and grass-fed, it’s also necessary to consider the aspect of local farms. Food grown local to you contains custom specific nutrients and micro-nutrients that fit specific needs of the animals and people in their local environment.

We care for animals with dignity and respect, and steward the soil for the health of the planet, the animals, and ourselves.
— Aaron F. Dill, Share the Gift

Grass Fed Beef, Greenhouse Gases, and Carbon Sequestration

output(1).jpg

Everything we eat has an impact on the environment. Although cattle produce methane and use carbon, they also provide significant nutrition per unit mass. All foods have a carbon and greenhouse gas emission -- whether you examine an omnivorous, vegetarian, or vegan diet. According to Dr. Jude Capper, “Although all foods vary in greenhouse gas emissions, it’s also important to look at the bigger picture – we need to account for the nutritional value of foods as well as the greenhouse gas emission. For example, lettuce may have a lower carbon footprint per pound than beef, but beef provides far more nutrients per unit of mass. Furthermore, we need to look at the bigger environmental picture – biodiversity, water use, land use and many other factors need to be considered, not just greenhouse gases.”

Contrary to popular belief, grass fed beef may be a net carbon sink. The keys to putting carbon back into the ground is to prevent overgrazing and over-tilling. When plants are not tilled, their root structures can grow several feet deep, sometimes up to 12 feet below the surface. These roots are essential to break up compacted soil, build topsoil, and sequester carbon. When pastures are overgrazed, the plants can be killed and the soil is negatively affected. When enough grazing has occurred and  the ground has been fertilized by the cow’s manure, the plants are stimulated to grow and this is where regeneration happens.

A study from Michigan State compared the effect of conventional feedlot agriculture and adaptive multi-paddock grazing (a strategy using fencing to move cows from section to section to prevent overgrazing) on the carbon lifecycle over a period of 4 years. The study concluded that while the feedlot system produced fewer greenhouse gases, multi-paddock grazing produced a net carbon sink. The cows put carbon back into the soil! This means that well managed farms, working in harmony with nature, can be a net positive to our environment. This is the small, organic, grass-fed difference.

Our organic, grass-fed beef farm works in tandem with nature to regenerate soil, maintain wildlife ecology, protect water and air quality, and put carbon back into the earth.

References

Beef Pot Roast Instant Pot Recipe: Red Wine and Herb Infused for Valentine’s Day

Red wine and herb infused beef pot roast.

Red wine and herb infused beef pot roast.

This beef pot roast recipe is perfect for Valentine’s Day, a dinner party, or any time you want to have an elegant dinner without spending hours in the kitchen.

The red wine, vinegar, and herbs infuse the roast with an earthy and complex flavor. The result was a sophisticated, savory, and deeply satisfying dish. I served with creamy mashed potatoes, warm dinner rolls, and a bright green salad.

While the roast was cooking in the Instant Pot, the smells that filled our house were truly delightful. The combination of red wine, thyme, and rosemary was very enjoyable.

Happy Valentine’s Day!

Red Wine and Herb Infused Pot Roast

Inspired by this recipe

INGREDIENTS

  • 3 Tbsp butter, avocado oil, lard, or tallow

  • 2-5 lb Saint John’s organic grass fed beef pot roast

  • Salt and pepper

  • 1 cup beef broth (or chicken)

  • 1 cup red wine (I used a cabernet)

  • 4 tablespoons balsamic vinegar

  • 4-5 sprigs thyme

  • 4-5 sprigs rosemary

  • 1 red onion, chopped into 1.5 - 2 inch chunks

  • 1 parsnip, peeled and chopped into 1.5 - 2 inch chunks

  • 4-5 carrots, peeled and chopped into 1.5 - 2 inch chunks

  • ½ lb cremini mushrooms, chopped in half

  • 4-5 cloves garlic, minced

EQUIPMENT

  • Knife

  • Cutting board

  • Tongs

  • Vegetable Peeler

  • Instant Pot

  • Slotted Spoon

METHOD

Pat roast dry and season all sides well with salt and pepper.

Roast seasoned with salt.

Roast seasoned with salt.

On Instant Pot Saute mode, melt fat in Instant Pot. (I didn’t do this because my roast was too big to saute in the Instant Pot. I used a skillet then transferred it to the Instant Pot.)

Sear roast on all sides, about 2 minutes per side. Set roast aside.

Roast searing in skillet. This Saint John’s roast is huge!

Roast searing in skillet. This Saint John’s roast is huge!

Add broth, wine, vinegar, thyme, and rosemary to pan, scraping up bits from the bottom of the pan. If using the Instant Pot Saute function, turn off. If using a skillet, remove from heat.

Deglazing pan with wine mixture.

Deglazing pan with wine mixture.

Place roast in Instant Pot and cover with wine mixture.

Place lid on Instant Pot, set valve to “Sealing” and select “Meat/Stew” setting for 70 minutes. Enjoy the aroma filling your house as you prepare for a lovely Valentine’s Day dinner at home.

While roast is cooking, peel and chop the vegetables.

Vegetables chopped and prepped.

Vegetables chopped and prepped.

Allow Instant Pot to naturally release pressure for 10 minutes, then quick release.

Add vegetables to Instant Pot, place lid on, set valve to “Sealing” and select “Manual” high pressure for 10 minutes. Allow Instant Pot to naturally release pressure for 10 minutes, then quick release.

Vegetables added to Instant Pot, on top of roast.

Vegetables added to Instant Pot, on top of roast.

Remove vegetables with slotted spoon. Place roast on cutting board to rest for 10 minutes before slicing. Spoon wine mixture over roast to serve. Enjoy!

Pot roast, vegetables, and mashed potatoes.

Pot roast, vegetables, and mashed potatoes.

Did you give this recipe a try? Tag us on Instagram to let us know what you think!

Grass Fed Beef Benefits: Health

In recent years, we’ve all learned how what we eat affects our health and well-being. The quality of our food, especially protein sources, determines what is available for our body to heal, recover, and grow. Here are some of the benefits of choosing organic, grass fed beef, as it relates to health.

Saint John’s Organic Farm cows grazing on summertime grass.

Saint John’s Organic Farm cows grazing on summertime grass.

Grass fed beef is more nutrient dense than grain fed beef. Grass fed beef is 10 times higher in vitamin A, 3 times higher in vitamin E, and substantially higher in calcium, magnesium, potassium, and B vitamins in comparison to grain fed beef. Grass fed beef is lower in cholesterol, and it’s rich in stearic acid, which lowers cholesterol.

Grass fed beef is an abundant source of conjugated linoleic acid (CLA), an important group of omega-3 and omega-6 fatty acids. CLA has strong anticancer properties, encourages the buildup of muscle, and prevents weight gain. When cows are fed their natural diet and given quality, individualized care, they are able to provide us with an abundance of life-supporting nutrition.

There is a notable difference in the toxic load between conventional and organic beef. Organic beef has no risk of GMOS, synthetic fertilizers, hormones, antibiotics, pesticides, herbicides, or the notoriously harmful glyphosate. “Animal products pose a multiplied scenario – animals fed and fattened on corn, soybean, and alfalfa feed are basically accumulating and concentrating glyphosate, as well as other toxins including animal antibiotics.” - Dr. Zach Bush, MD

Maintaining health affects every aspect of our lives. When we are adequately nourished, we feel invigorated and have energy to pursue our life’s purpose and connect deeply in relationships. When we are ill, we feel and perform poorly, and health issues can have a significant impact on mood and emotional health. Ultimately, there is a financial cost associated with health, for better or worse. Healthy people have reduced medical bills, fewer lost days at work; they are happier people who are fruitful. Children with adequate nutrition have higher test scores and fewer behavioral problems. Because food is preventative ‘medicine’, there is an economic advantage to investing in your health. The phrase “an ounce of prevention is worth a pound of cure” comes to mind.

Pikaberry enjoying the sunshine.

Pikaberry enjoying the sunshine.

Health starts at the cellular level, ultimately through nutrition. Our beef is packed with essential nutrients to power you and your family to live and love your life. If you want to boost your health, strength, and vitality, give our organic grass fed beef a try!

Grass Fed Beef Instant Pot Recipe: Creamy Taco Soup

Bowl of Creamy Taco Soup

Bowl of Creamy Taco Soup

This creamy soup is Tex-Mex at its finest. My Texan mom is an Instant Pot whiz, and she created this soup that I’m eager to share. Growing up in Texas, zingy and creamy dishes like this served with cornbread and butter were a staple.

As I was cooking this recipe, the smells that filled my house transported me back to late 90s north Texas, full of happy memories, simpler times, and delicious food. She was a busy, working mom, and she made a lot of effort to cook a nutritious meal for us every night.

Now that I’m a toddler mom, I use the Instant Pot several times a week to make my life easier. This soup is prepared entirely in the Instant Pot, so there is very little cleanup after cooking. All in all, active cooking time was about 25 minutes.

This recipe is flavorful without being spicy, making it a kid-friendly dish. If you like it spicier, adding a seeded and chopped jalapeno with the other pepper would be a delicious addition.

I hope you find comfort and flavor in this dish! Thanks, Mom!

Creamy Taco Soup

INGREDIENTS

  • 1 cup dry or 1 15 oz can pinto beans

  • 2 Tbsp apple cider vinegar, optional

  • 3 Tbsp butter

  • 1 onion, chopped

  • 1 pepper, chopped (I used bell pepper, poblano or anaheim would work nicely as well.)

  • 1 lb Saint John’s organic, grass-fed ground beef

  • 2.5 Tbsp chili powder

  • 1 tsp cumin

  • 2 c chicken or beef broth

  • 15 oz tomato sauce

  • 10 oz diced tomatoes with green chiles, drained

  • ½ block cream cheese

Optional garnishes:

  • Sour cream

  • Cheddar cheese, grated

  • Roasted hatch green chiles

METHOD

Instant Pot Pinto Beans

If your pinto beans are dry, here’s how you cook them in the instant pot. If your beans are canned or already cooked, skip ahead to “Creamy Taco Soup”.

The night before or about 8 hours before cooking, soak the beans in the instant pot with water about 2 inches above the beans. Add 2 Tbsp apple cider vinegar, stir into beans, and let sit 8-12 hours.

Soaking the beans before cooking helps pre-digest them and neutralize lectins and other anti-nutrients. This also reduces cooking time and promotes a more even cook on each bean, preventing splitting and bursting.

Pinto beans soaking in water and apple cider vinegar.

Pinto beans soaking in water and apple cider vinegar.

When the soaking time is up, drain the beans in a colander and rinse well. Add back to instant pot and cover with water about 2 inches above the beans. Place lid on instant pot. Set valve to sealing. Select manual pressure, high setting, and cook for 25 minutes. If you didn’t soak beans, cook for 35 minutes. 

When cook time is up, allow instant pot to depressurize for 10 minutes and then quick release. Drain and rinse beans and set aside.

Drained and rinsed pinto beans.

Drained and rinsed pinto beans.

Creamy Taco Soup

Set the instant pot to the “Saute” setting and add butter. When butter is melted, add chopped onions and cook until translucent, about 3 minutes. Stir occasionally as the saute function is very hot.

Chopped onions, sauteeing in butter.

Chopped onions, sauteeing in butter.

Add ground beef and season with 2 pinches of salt. Break up ground beef with a wooden spoon as it cooks, stirring frequently. When ground beef is 75% cooked, add pepper.

Green pepper and Saint John’s ground beef sauteeing in Instant Pot.

Green pepper and Saint John’s ground beef sauteeing in Instant Pot.

When ground beef is finished cooking, add chili powder and cumin and turn off Saute function.

Chili powder and other spices added to Instant Pot.

Chili powder and other spices added to Instant Pot.

Add broth, tomato sauce, and drained diced tomatoes with green chiles. Stir to combine.

Place lid on instant pot. Set valve to sealing. Select manual pressure, high setting, and cook for 10 minutes.

When cook time is up, allow Instant Pot to depressurize for 10 minutes and then quick release.

Add beans and cream cheese and cover, stirring every minute or so until cream cheese is melted into soup. When cream cheese is melted, add salt to taste. The amount of salt you need will vary as sodium content in canned items and broths can vary quite a bit. Start with ¼ tsp, taste, and add more if needed. I ended up adding about ½ tsp.

IMG_0697.JPG

Set to “Keep Warm” setting to keep the soup warm until you’re ready to serve!

We served it with sour cream and roasted hatch green chiles. Rice or tortilla chips would make a nice pairing with this delightful soup.

Creamy Taco Soup topped with roasted green chiles.

Creamy Taco Soup topped with roasted green chiles.

We all had seconds and my husband had thirds! This soup is a perfect quick dinner for wintertime that is packed with Tex-Mex flavor. Enjoy!

IMG_0707.JPG

Tag us on Instagram to let us know what you think!

Grass Fed Beef Bone Marrow: Use it for a Luxurious Steak Dinner in Twenty Minutes

Marrow bones in pan, ready to be roasted.

Marrow bones in pan, ready to be roasted.

This is a recipe for the French dish Entrecote à la Bordelaise, a classic ribeye steak served with shallots and bone marrow.

A bite of this can be best described as "meat heaven". It feels luxurious, is incredibly nourishing, and takes only 20 minutes to prepare. Enjoy!

If you’re active on Instagram, please tag us at @stjohnsorganicfarm when you post a photo of the final result! We’d love to see how it went in your kitchen!

Entrecote à la Bordelaise

INGREDIENTS

  • 2 St. John’s organic, grass-fed ribeye steaks

  • 3-5 St. John’s organic, grass-fed marrow bones

  • 1 shallot, finely diced

  • salt

  • pepper

METHOD

  1. Preheat oven to 400 degrees. Place bones in baking dish and bake 15 minutes or until marrow is easily removed from bones.

  2. Using a butter knife or small spoon, remove marrow from bones.

  3. Pat steaks dry with paper towel and season well with salt and pepper. Grill steaks until medium-rare, about 3-4 minutes per side.

  4. While steaks are warm, spread bone marrow on steaks and garnish with shallots. Serve immediately.

I hope you enjoy this simple and delightful French dish. Tag us on Instagram to let us know what you think!

Updates from the farm. Dec 2020

The weather is clear and chilly, the days are gorgeous and sunny, and a bit brisk if the breeze picks up.

Saint John’s Organic Farm

Saint John’s Organic Farm

We started feeding hay last week; Aaron and Claire load up 5 of our 750lb bales on the trailer and take it out to the field where they spread it out down the paddock. Right now we have two groups of cows who are each eating about 1000 lbs of hay per day. So Aaron and Claire take out about 4 loads in a morning and then there is enough hay out for the next week. Aaron will set up a movable electric fence to give the cows an appropriate section each day, along the same theory we use when grazing the paddocks in the summer. We have found that it is really good to keep cows in the field all year long, they do just fine in the cold. We adjust their feed rations so they get more if the temperatures plummet, and try to feed a little extra so there are leftovers for them to sleep on, but they seem to adapt quiet well to the low temps. It’s great to have them out on the grass turf even though the grass is pretty well grazed down, they stay healthy in the fresh air and sunshine, and the manure is distributed straight back to the field; it’s a lot less work than cleaning corrals, managing compost windrows, and hauling compost out to spread in the fields.

Aaron Dill - with Ragnar, hauling hay out to the field

Aaron Dill - with Ragnar, hauling hay out to the field

The steers are still grazing, and doing well on the stockpiled grass. At this rate we’ll graze them all winter long on grass that grew this fall. We’ve managed to do this every year for the last 10 years, except for the snowpocalyse in 2016. Then we had to feed hay to the steers too, though the grass was still viable to graze after the snow melted down.

Our frost-free waterlines are working well to all groups of cows. What a gorgeous system! Aaron turns them on when he goes out on his daily rounds to move fences to feed cows, and then several of us split up in the evenings to go drain the short supply hoses for the night. So much better than the years when we had to haul all their water out in a 500 gallon tank! Especially with 125 head, many of which are eating hay, we were hauling water almost every day.

Beef harvest is all wrapped up for the year, but we have about 7 pallets full of beef in Boise Cold Storage, so we’re well supplied to meet anyone’s beef needs throughout the winter and spring!

We are already looking at which rib roast we want for Christmas dinner.

Cold plunge! November 2020. Click on the picture to see a video of the whole experience!

Cold plunge! November 2020. Click on the picture to see a video of the whole experience!

Aaron recently began a new practice of ice water plunges, exploring the Wim Hof practice for health. He set up an old water tub in his backyard, and goes out every couple days to immerse in the ice water. There is some interesting research on the effect of cold exposure, to strengthen your circulation and thermo-regulation, and how it causes a reaction in your core to superheat your blood, like a microfever which cooks out impurities and kills viruses. This takes training however, so it’s best to start with cold showers. Aaron is putting together a progression of cold exposure training ideas that he’ll post on his Share the Gift instagram and facebook pages in the near future. Enjoy! 

May your holidays be bright in the midst of a crazy year, may you enjoy the warmth of your family, and may God grant us all peace.

An Amazing Beef Liver Recipe (That Doesn’t Taste Like Beef Liver)

Beef liver fries

Beef liver fries

Beef liver is known for two things: its all-star nutrient profile and its pungent, unmistakable taste.

My family has tried 4 beef liver recipes in the last year, and this one is excellent because...well, it doesn’t taste like liver! 

The key is to slice and soak the liver; the soaking removes the pungent taste. 

After soaking, the liver is battered, fried, and dipped in garlic aioli --  it’s a crowd-pleasing, crunchy preparation. Enjoy!

Beef liver fry dipped in garlic aioli.

Beef liver fry dipped in garlic aioli.

If you’re an instagramming kind of person, please tag us at @stjohnsorganicfarm when you post a photo of the final result! We would love to see how it went in your kitchen!


Beef Liver “Fries”


INGREDIENTS

  • 1 lb St. John’s organic, grass-fed beef liver

  • 2 - 2 1/2 c flour

  • 1 teaspoon paprika

  • 1/4 tsp salt

  • 1/4 tsp black pepper

  • roughly 2  c buttermilk, milk, or whey

  • roughly 1 c beef tallow, enough to be at least 1/2 inch deep in frying dish

EQUIPMENT

  • cutting board

  • knife

  • food storage container with lid

  • heavy-bottomed dutch oven or deep skillet

  • prep bowls

  • tongs

  • cooling rack (optional)

  • baking sheet (optional)

  • splatter guard (optional)

METHOD

1. Slice liver into 1/4 - 1/2 inch wide strips. Place into food storage container and cover with buttermilk, milk, or whey. I used about 1 cup. Place in refrigerator and allow to soak for at least 2 hours. I left it soak overnight and continued the preparation the following day.

Beef liver sliced into ½-inch wide strips.

Beef liver sliced into ½-inch wide strips.

2. Drain liver and pat dry.

3. Mix together flour, paprika, salt, and black pepper in a shallow bowl. Pour remaining 1 cup buttermilk, milk, or whey into another small bowl.

4. To batter the liver, roll one slice in seasoned flour, dip in milk, and roll in flour again. Place slice on cooling rack. Repeat until all liver slices are battered.

Battered liver slices placed on cooling rack, ready for frying.

Battered liver slices placed on cooling rack, ready for frying.

5. In a heavy-bottomed Dutch oven (I used cast iron), melt tallow on medium heat. When tallow is about 350 degrees, it’s ready to use. If you don’t have a thermometer, sprinkle a pinch of flour on the tallow. If it sizzles and swirls, it’s ready.

Tallow melting in Dutch oven.

Tallow melting in Dutch oven.

6. Place 2-3 paper towels on baking sheet with  unused cooling rack on top. This will be where the fried liver will rest after cooking. The paper towels will help absorb any extra fat.

7. Using tongs, slowly add 3-5 battered liver slices to the hot tallow. The tallow should sizzle and bubble around the liver. Be careful not to crowd the pan, as that will cause the tallow to cool and prevent it from cooking properly. 3-5 slices worked well for my pan.

Liver slices frying in tallow. The bubbling means the tallow is hot enough!

Liver slices frying in tallow. The bubbling means the tallow is hot enough!

8. The liver will cook quickly. Using tongs, slowly flip each liver slice after 1.5 - 2 minutes. Cook another 1-2 minutes and transfer to cooling rack. Repeat until all liver is fried.

NOTES

1. Kid-friendly modification: To make this recipe more kid-friendly, substitute ketchup, mustard, or sour cream for garlic aioli and omit or use less paprika and black pepper in the seasoned flour.

2. Easily reheat by baking at 200 degrees for 10 minutes.

Garlic Aioli

INGREDIENTS

  • 1 large egg

  • 1 - 1.5 c avocado oil, olive oil, or melted duck fat

  • 1 - 2 cloves garlic, minced

  • 1 tsp mustard

  • 1 Tbsp apple cider vinegar or distilled white vinegar

  • 1/4 tsp salt

EQUIPMENT

  • blender or immersion blender

  • rubber or silicone spatula

  • spoon

METHOD

1. Crack egg into blender.

2. Turn blender on medium speed and blend egg.

3. While blender is mixing, very slowly pour oil or fat into blender. Start with one cup and add more at the end to reach your desired consistency. 1 1/3 cup was ideal for me. The stream of oil should be thin. It’s essential to pour slowly for a proper emulsion to form. It should take 4-5 minutes to pour the oil. After 1 cup of oil has been blended in, turn off blender and gently shake and scoop aioli with spoon to determine if desired consistency has been reached. If you prefer your aioli to be thinner, add 1/4 cup of oil at a time in the same slow manner.

4. Turn off mixer. Add garlic, mustard, vinegar, salt. Blend. Taste for salt and desired tanginess. You may desire more mustard or vinegar.

5. Serve at room temperature or chilled. Store in an airtight container in the refrigerator.

I hope you enjoy this unique and crunchy preparation of beef liver. Tag us on Instagram to let us know what you think!

Gourmet Smoked Burgers

IMG_E8530.JPG

Use these gourmet smoked burgers as a template for any flavor combination you desire!

Below are a few of our favorite recipes for toppings, and directions on how to smoke an amazing burger.

Smoking Hamburgers:

  1. Thaw frozen burger in the fridge for 1- 2 days. Working with the thawed burger, a scale, and if you have one a burger press (this is the one I use).

  2. I make 6oz Burgers in my house and usually 12 at a time on a sheet tray. I just season with a good Real Salt or Himalayan Sea Salt and pepper.

  3. Fill the tray of an electric smoker with desired wood chips. I have used apple, Pecan, Hickory, Mesquite, Alder, Cherry…. They are all good but do give differences in flavor so play around.

  4. Then put water in the water tray and turn the smoker on high to preheat to around 200.

  5. Put the burgers in and that is it.  You just want to monitor for temperature and that wood chips don't run out. 

For a med-well to a well-done burger the guideline is 155 for the internal temp. This will take you 45 min to 1 hour of cook time. For those of you who prefer a less done burger remember to handle your raw meat carefully and have a super good clean source for your meat! We use St. John’s Organic Farm and their locally grown, harvested and butchered beef.

Once the burgers are to temp, remove them and the fun of topping them begins!

Note: If you are making cheeseburgers of any kind, you can add the cheese right in the smoker while the burgers are reaching their last 2-5 degrees of internal temperature. You only want the cheese in there for about 5 minutes so it doesn’t run everywhere.

Gourmet Topping Recipes

Cherry-Smoked Burgers with Brandied Cherry Chutney, Dubliner Cheese, Green Leaf Lettuce and a Brioche Bun

Brandied Cherry Chutney (makes 1 qt):

4 cups pitted Bing cherries

1/2 cups brandy

1/4-1/2 cup raw honey

2 tsp almond extract

Dash salt

1-2 tbsp cornstarch or arrowroot slurry (equal parts starch and water, mixed)

  • Place cherries, brandy, honey, salt, and extract in a saucepan and bring to boil.

  • Cook till cherries are soft (but not falling apart) for about 5 min.

  • While boiling and stirring constantly add slurry and cook till thick.

  • Remove from heat and store in a quart jar with a lid.

  • Use cold room temp or hot! 

Hickory-smoked Grass-Fed Burger with Strawberry Relish, Green leaf lettuce and a brioche bun (this would also be awesome with fresh Mozzarella cheese)

Strawberry Relish (makes 1 qt):

 3-4 cups whole stemmed strawberries

 1/2 cup fresh basil leaves

 3 tbs raw honey

 ¼-1/2 cup red wine vinegar

 Salt and pepper to taste

  • In a food processor combine all ingredients and pulse til small chunks but not a paste or sauce. Think pickle relish! Adjust vinegar and seasoning to make it as tart as you want it. The idea is to replace pickles with this relish.

  • Store in a quart jar in the fridge. The relish with continue to ferment due to the vinegar—this is a good thing! Fermentation helps develop a tasty flavor.

Apple-Smoked Greek-style Burger with Tzatziki sauce, Chevre, Cucumbers, and Arugula on a Brioche Bun

Tzatziki Sauce (makes 1 qt):

1 qt plain, whole milk yogurt

Zest and juice of one lemon

1 clove fresh garlic or 1 tsp garlic powder

½ seeded, unpeeled English cucumber minced or diced

⅛-¼ cup mint leaves

Salt and pepper to taste

  • Place lemon juice, zest, garlic, salt and pepper, and mint leaves along with yogurt in a food processor and process till smooth.

  • Add cucumber after the rest is processed to add some texture. Adjust seasonings to taste.

  • Store in a 1 quart jar in fridge for up to 10 days.

For assembly:

This Burger with thin slices of cucumber over the fresh goat cheese on top of the burger. Put the Tzatziki sauce on both sides of the bun and Arugula in between!

Pecan smoked burger with Apricot Salsa, Smoked Gouda cheese, Red Leaf lettuce on a Brioche Bun

Apricot Salsa (makes 1 qt):

4 cups pitted, halved fresh apricots

Juice of 1 lime

⅛-¼ cup cilantro leaves and stems

½ red onion, peeled and roughly chopped

1 jalapeno, stem off

½ English cucumber

1 tbs raw honey

Salt and Pepper to taste

  • Combine all ingredients except apricots and cucumber in food processor and blend to almost a paste. 

  • Add in cucumber and ½ the apricots and pulse till small chunks, but not to a paste.

  •  Pour mixture into a bowl.

  • Pulse remaining apricots to the desired chunk size and add to the rest of the salsa. 

  • Adjust all seasonings to taste!

  • Store in a quart jar. The salsa should last 2-3 weeks in the fridge.

(Note: this salsa is also great on fish tacos, chicken and tortilla chips!)

For assembly:

Add the sliced gouda to the burgers the last 5 min of cook time. Then assemble with the salsa on both sides of the bun and lettuce on top of the burger!

Mesquite-Smoked Bacon Blue cheese burgers with Lettuce and Gourmet mustard on a brioche bun

  • For these burgers, I place strips of raw bacon on top of the burgers or alternatively wrap the burger patties in bacon before smoking them. 

  • The bacon will cook with the burgers and then the last 5 minutes of cook time I top the burgers with several ounces of my favorite blue cheese to get all melty.

  • For assembly, they just require a bun, some great lettuce, amazing mustard and (optional) smoked or grilled onions! Yummy!

Alder Smoked burgers with Chestnut Mushrooms in red wine sauce with Roquefort Cheese, Onion Aioli, Red leaf lettuce, and a Brioche Bun

Mushrooms in Red wine sauce (makes 1 qt):

4 cups chestnut or criminology mushrooms, cleaned and diced

2 tbs avocado oil

Salt and pepper to taste

1 cup red wine like Cabernet or Merlot

3 tbs butter

  • Heat oil in a large saute pan on high heat till smoking.

  • Add in mushrooms and season with salt and pepper.

  • Saute until mushrooms are soft and then deglaze with the red wine.

  • Simmer until the liquid is reduced by half. Turn the heat to low and add the butter.

  • Serve right away or keep warm.

(Note: this sauce is also excellent over steak!)

Onion Aioli (the cheater’s way)

1 cup mayonnaise

1 sweet onion or red onion, sliced

Salt and pepper 

Dash white vinegar

  • First, saute or grill onion till caramelized and very soft.

  • Place the onion in the food processor with salt, pepper, and vinegar and process until it is a paste.

  • Add in mayonaise and blend until smooth

  • Have a taste and adjust seasonings according to taste.

  • Store in the fridge for 1-2 weeks

For assembly: 

Top the smoking burgers in the last 5 mins of cook time with a couple of ounces of your favorite Roquefort cheese.

Start with the mayo on each side of the bun, then the burger with the cheese, then top with a good scoop of your mushrooms. Top with your lettuce and shabang! One yummy messy amazing burger!